Since my husband and I started our diet in January, all I can think about is making things that are “unhealthy”. Well this weekend I knew I’d be able to unload this batch of cookies, so I thought I’d indulge my craving. This recipe is adapted from the book, “jam it, pickle it, cure it” by Karen Solomon. It is a fun little book of DIY basics like bacon, cheese, butter, marshmallows and even drinks. It’s got a little bit of everything actually! It’s a newer cookbook of mine, and I’m looking forward to trying more of the recipes.
These cookies were good, but I think I would have preferred the cookie to be a little more crisp. These kind of tasted like a chocolate shortbread, but not as sweet. The filling sweetened them up just enough though!
Chocolate sandwich cookies
Cookies:
1 cup granulated sugar
2 ½ cups all-purpose flour
½ cup unsweetened Dutch-process cocoa powder
2 teaspoons baking powder
½ teaspoon kosher salt
¾ cup unsalted butter, chopped into cubes
2 egg yolks
2 teaspoons vanilla extract
½ cup bittersweet or semisweet chocolate chips, melted and cooled
2 tablespoons water
Filling:
2 cups confectioners’ sugar
2 tablespoons light corn syrup
3 tablespoons light cream (the original recipe called for evaporated milk, but cream worked fine as a substitute)
*note: I doubled the original recipe because it wasn’t even enough for 1/3 of my batch of cookies.
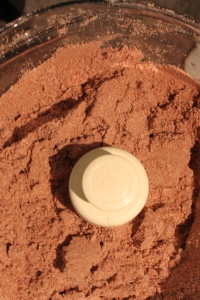
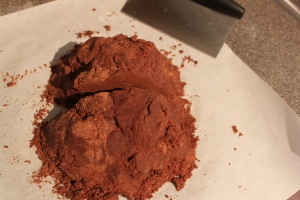
To make the cookies in a food processor, start by processing the granulated sugar for 30 seconds, then adding the flour, baking powder, salt, and cocoa to combine. If not using a food processor, in a bowl, combine the superfine sugar with the flour, cocoa powder, baking powder, and salt. Add the butter and combine just until coarse crumbs form. Blend in the egg yolks and vanilla. Scrape the melted chocolate intot he batter and mix to combine completely. Add the water, 1 tablespoon at a time, until the dough comes together when squeezed in your hand. Note that the batter will be crumbly, but cohesive.
Preheat the oven to 400 degrees F, and grease 2 baking sheets. (I just used my silicon liners.) adjust the oven rack to the center of the oven.
Gather the dough together on top of a piece of parchment paper or wax paper with a scraper nearby. Divide the dough in half, and shape each piece into a flat square. Set one square aside and roll out the first square by covering it with a second sheet of parchment paper, and flattening it into a large rectangle about 13”x15” (the dough will be about ¼ inch thick).
Cut out as many cookies as you can using an inverted glass or cookie cutter, use a size to your preference. I chose to make mine smaller, like traditional Oreo cookies. Gather the remaining scraps of dough and cut out more cookies. Note that a scraper is a great tool for moving the cookies from counter to baking sheet.
Bake the first sheet by itself for 7 to 9 minutes, or until the edges are slightly dark, they smell very chocolaty, and the cookies are brown on the bottom. The cookies will rise during baking, but flatten out again once cool. Let them cool on the baking sheet for 2 minutes before transferring to a wire rack.
Meanwhile, repeat the rolling and the cutting with the second half of the dough. Roll out the scrap pieces of dough between the papers again, and cut out as many cookies as possible. If the dough gets too soft to work with, leave on parchment and chill in the fridge or the freezer for a few minutes.
Bake the cookies as above. Cool all the cookies on a rack for about 30 minutes, or until they are cooled to room temperature, before sandwiching.
To make the filling, in a large bowl combine the confectioners’ sugar, corn syrup, and milk until they form a sticky mass. Spoon the mixture into a pastry bag. Alternatively, use a sealable plastic bag, and snip off a tiny corner of the bag with scissors.
To assemble the cookies, with the flat side of a cookie facing up, squeeze out icing onto the center of a cookie and lay the flat side of another cookie on top, giving it a twist to spread the icing around. The amount of icing you use will depend on the size of the cookies, so you’ll have to use your own judgment. Note that as the cookies sit, the icing will spread a bit more. It’s best to let the cookies firm up a little before serving, about 1 hour.
Store at room temperature, in an airtight container, up to 1 week.


okay I’m hungry now!